One major hurdle towards mass adoption in Web3 is the use of address hashes as a means of coordination. For example, whenever a user sends funds or interact with a smart contract, they must always address their interaction towards an Ethereum address. While a 42 character hexadecimal hash efficiently secures the network, it is not exactly intuitive for people.
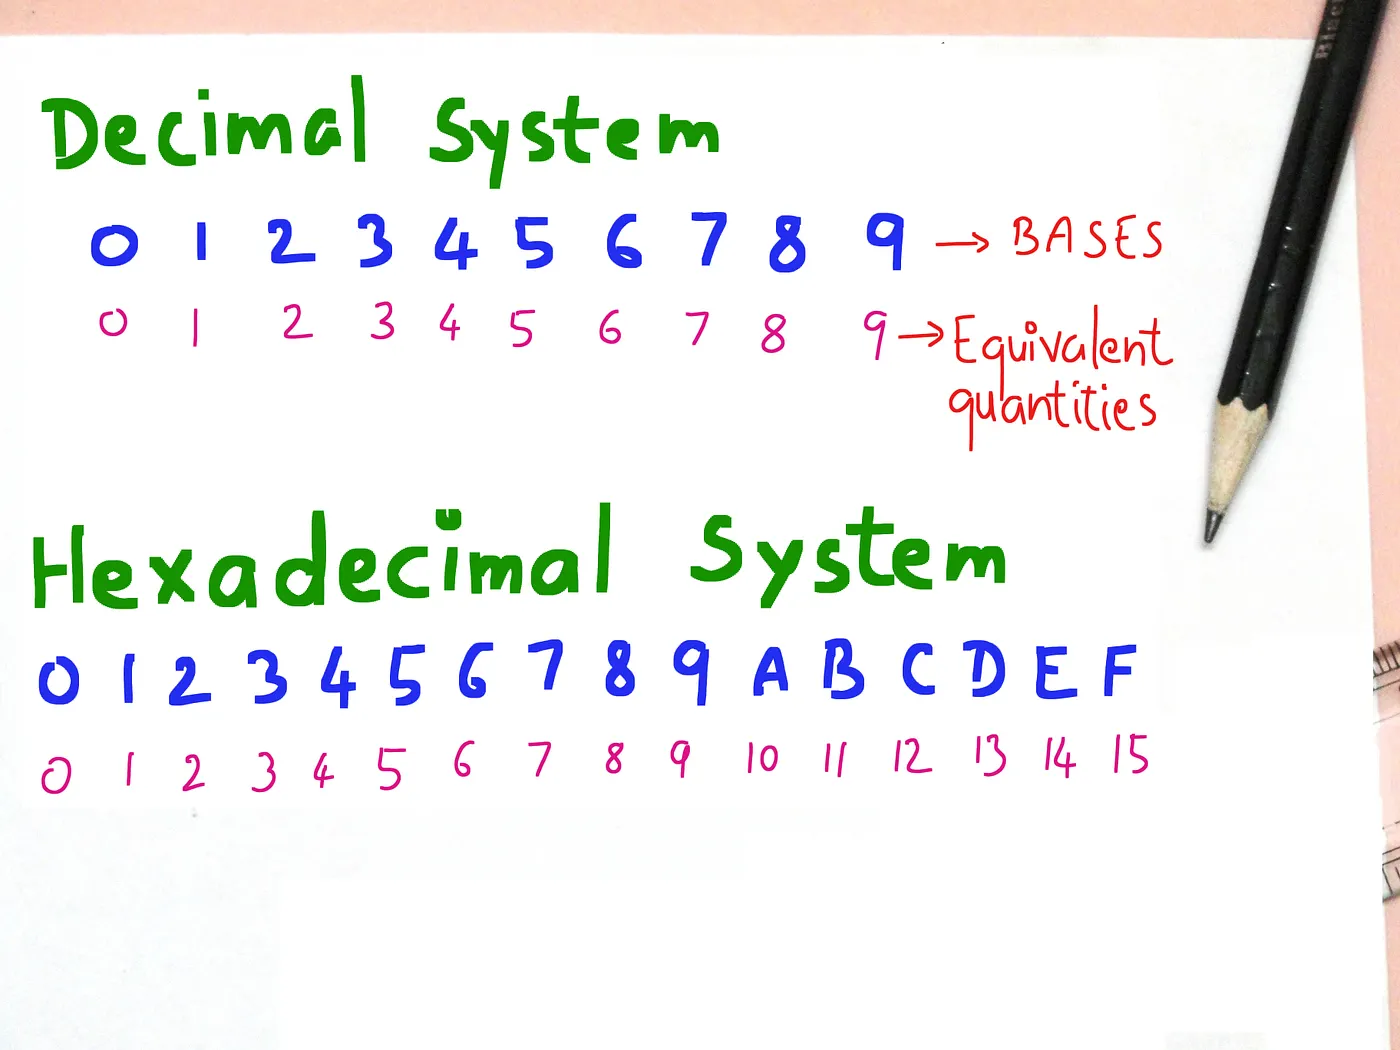
As an example, if anybody wanted to send me ETH, I would have to send them my public address: 0xB39f45dE478b4f5Cca77E02677fB8D2a4F60A123. Even after having completed hundreds of transactions, my heart can’t help but skip a beat every time I need to send a large transaction. Needless to say, the average user with minimal crypto knowledge will never be confident enough to send a transaction if this continues to be the case.
This problem is not unique to the crypto space as many payment systems also rely on a unique string of numbers/alphabets (UUID) when it comes to routing money to the correct account. I would hazard a guess that there are more people that can recite their full phone numbers from memory compared to their bank account numbers. Nowadays, the user experience for a cash transfer is much improved as financial institutions can rely on a combination of identifiers to uniquely identify each individual.
ENS (Ethereum Name Service) is the first step in this direction by enabling Ethereum addresses to be formatted in a more human readable form. For example, after registering for an ENS domain, I can just instruct users to send funds directly to awkaishin.eth instead of having to quote my whole address in hexadecimals (i.e. 0xB39f45dE478b4f5Cca77E02677fB8D2a4F60A123) . My ENS domain is mapped 1-to-1 with that particular address and I can be assured that awkaishin.eth is globally unique. While this introduces concerns around scalability (due to limited readable names), it is a crucial step towards making decentralised identity on Ethereum more accessible for the general public.
The rest of this article showcases how you can get your own ENS domain. I will be walking through how I obtained the awkaishin.eth domain as an example. Do note that ETH is required in order to purchase the domain as well as pay for the gas fees. For ownership of my domain for 5 years, I paid a total of 999999ETH including all the transaction fees. If you would prefer to experiment with ENS without the monetary value, the ENS app is also connected to various testnets which can be found on their documentation.
Getting your own ENS Domain
ENS is managed by True Names Limited and can be accessed via their website ens.domains. Upon accessing the app, we are now faced with the most important task: deciding on your ENS name. As mentioned above, I will be purchasing the awkaishin.eth domain.
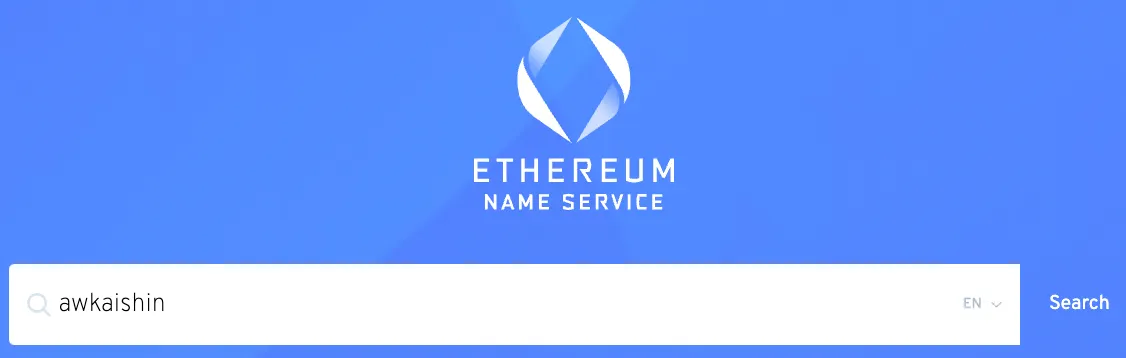
Enter your ENS name into the search and you should be able to see whether it has previously been registered. This guide assumes that the name that you chose is still available. If you really want to get a domain which has already been bought, you might be able to find it on the secondary markets such as Opensea, but beware that domain squatters are demanding an exorbitant amount of money even in the current climate.
Once you’ve got an available domain, you can click on it and you should see the screen below where you can configure the number of years you would like to purchase the domain for. There is a fixed price for every year that is added to the purchase but the transaction fee is fixed regardless of the number of years. Do note that the registration is a multi-step process whereby you will have to approve a request and a registration transaction.
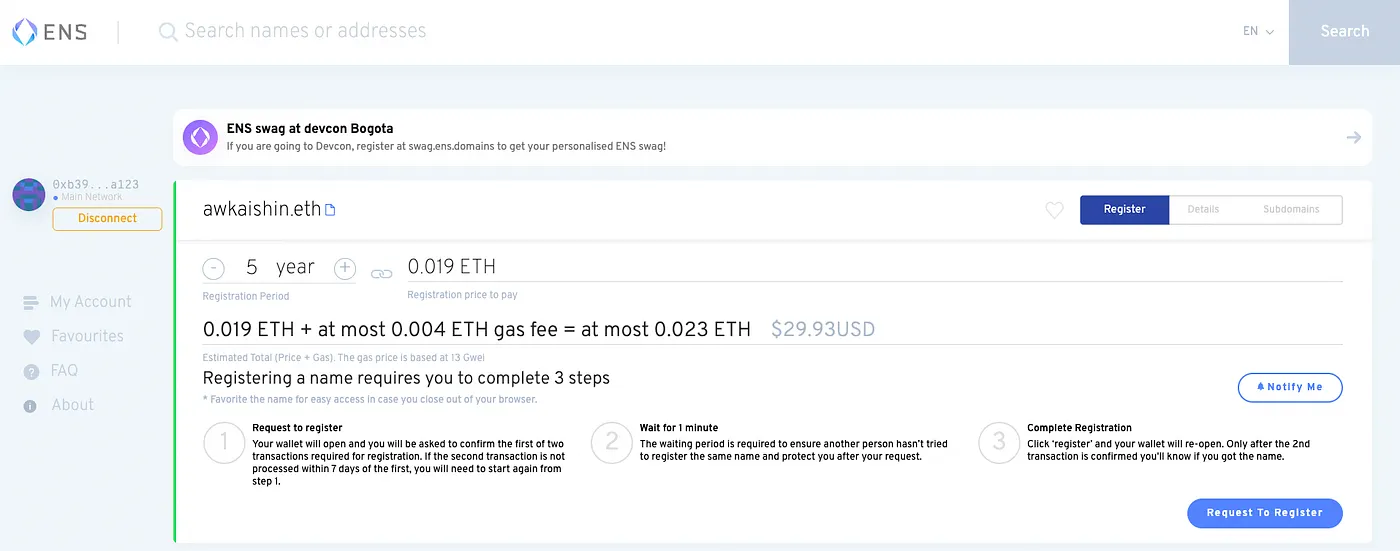
Upon clicking the “Request to Register” button, you will be prompted to sign the request transaction that is going to the ENS smart comtract. You can navigate to the “DATA” tab in Metamask if you’re curious about the specific function that is being called.
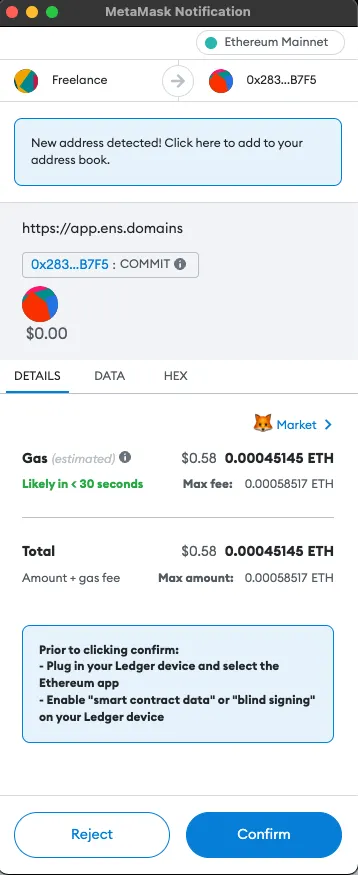
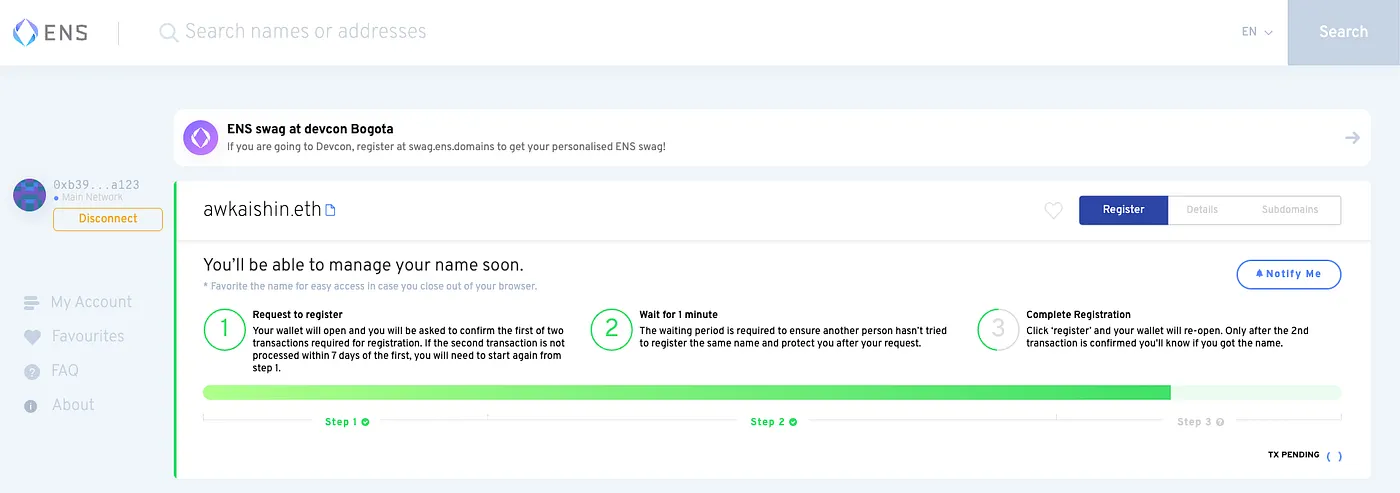
Once confirmed, you should then see a green loading bar appear as the ENS smart contract waits a minute to ensure that there are no duplicate transactions registering the same domain.
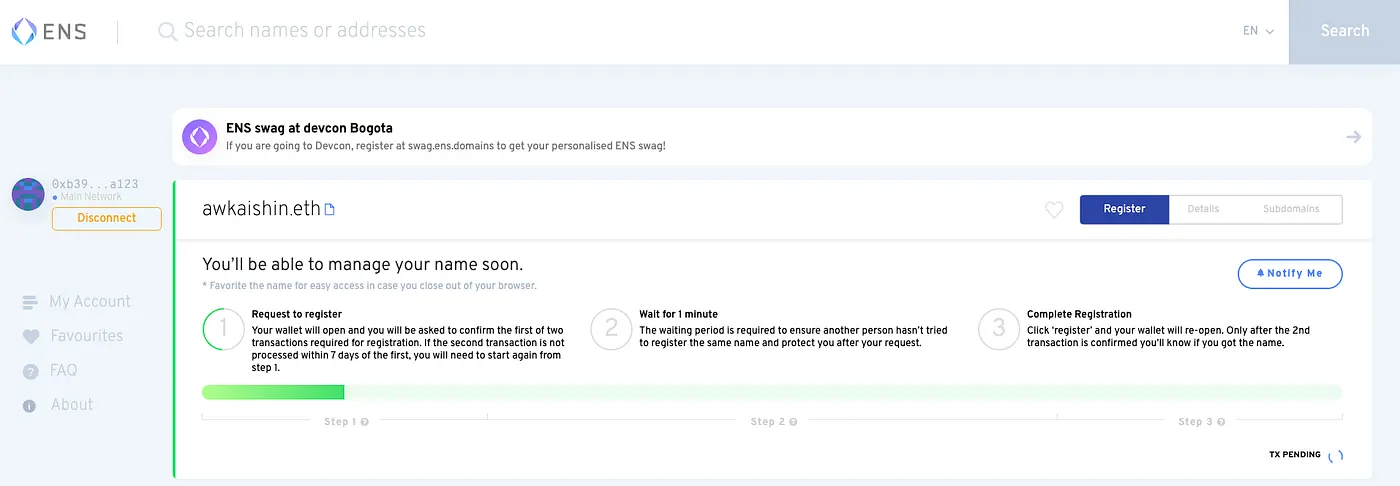
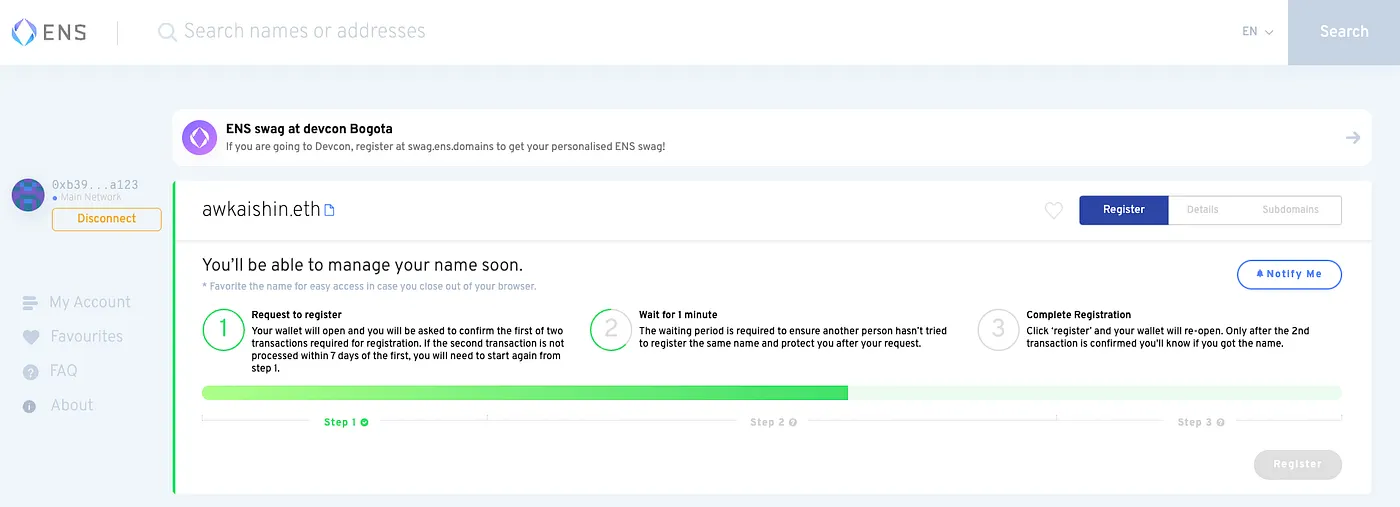
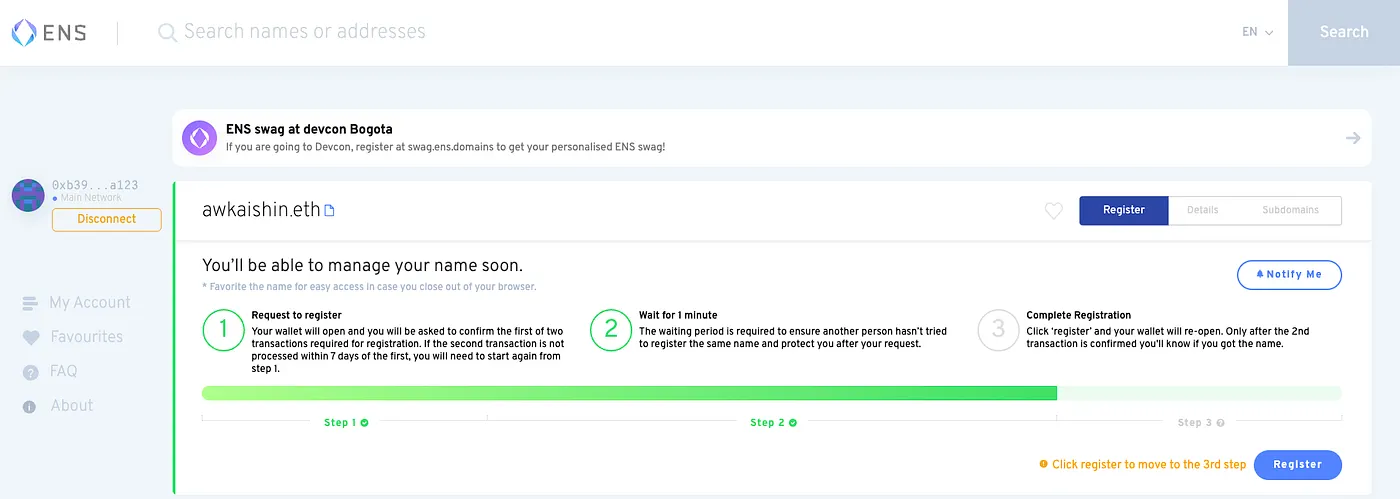
After ENS has confirmed that there are no duplicate domain registrations, you can now click on the “Register” button to complete the registration process. Do note that this registration is only valid for 7 days after the first transaction is completed. Failing to register within this period will require the process to be started again from the beginning.
On selecting the “Register” button, Metamask will prompt you to approve the main transaction. It is this transaction where you will be able to see the actual transaction value (to register the domain for x number of years) against the gas fee for the transaction.
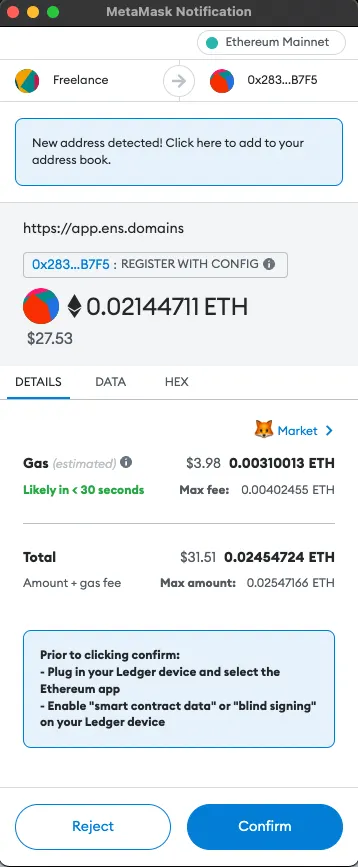
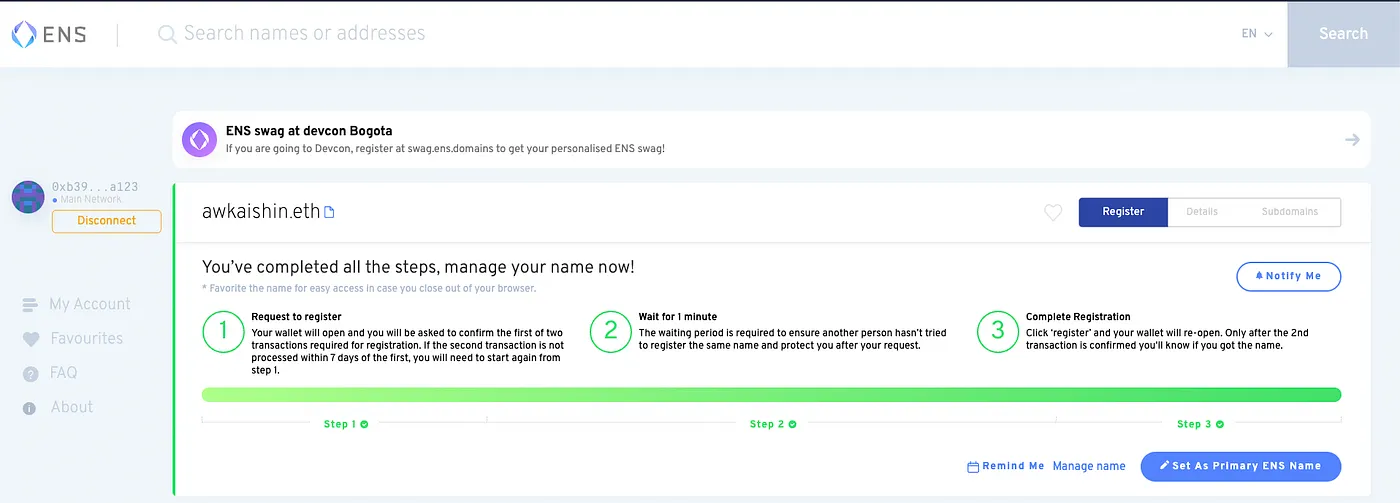
After confirming the transaction in Metamask, the ENS app will await the transaction confirmation by the network. Once the transaction has been mined, you have obtained your first ENS domain!
Configuring your ENS
Once the ENS domain is in your wallet, we can then go ahead and configure our wallet (i.e. 0xB39f45dE478b4f5Cca77E02677fB8D2a4F60A123) to use the newly purchased domain (i.e. awkaishin.eth). On the purchase screen, you should be able to see a “Set As Primary ENS Name” button available after your register transaction was successfully confirmed.
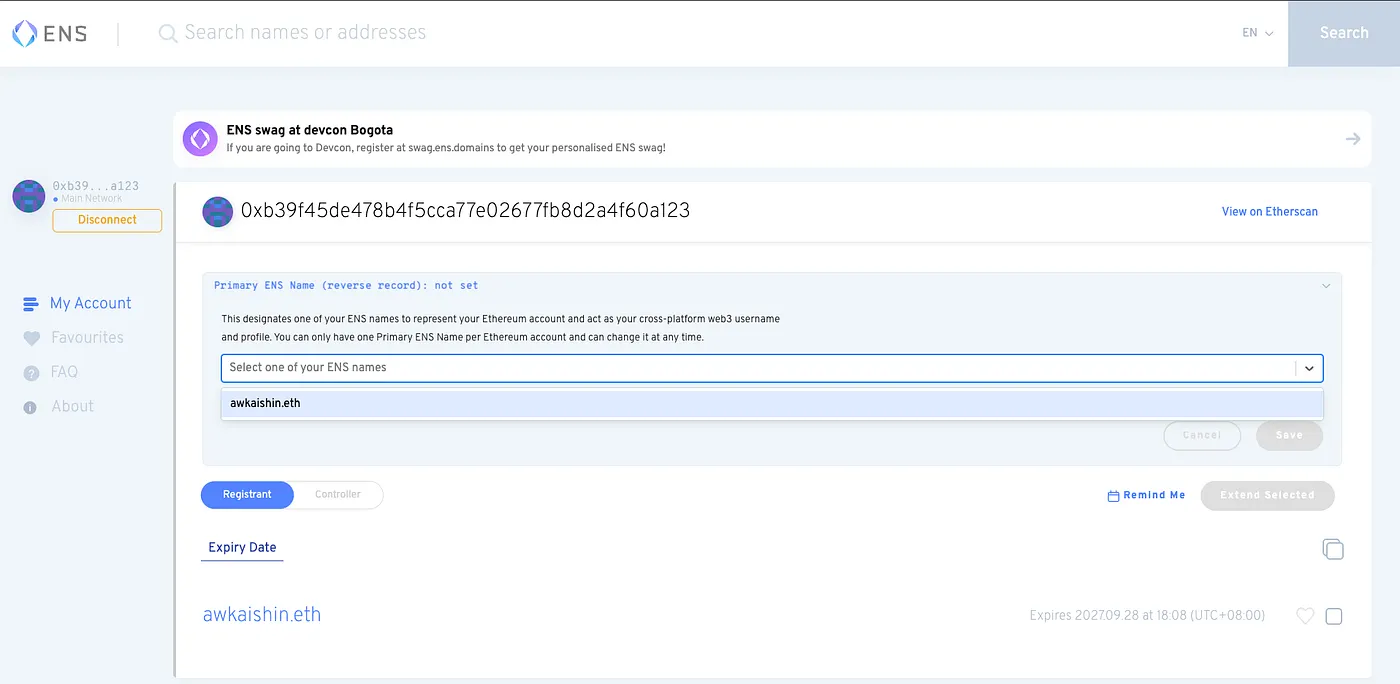
Upon clicking this button, you will be able to see the configuration page for the connected Ethereum address. We can then bind this address to our domain by selecting it from the dropdown and saving our selection. Do note that all the ENS domains purchased by this address will be shown in this page.
For our very last transaction, we will be asked to confirm another transaction as this setting of ENS name will change the data on the blockchain.
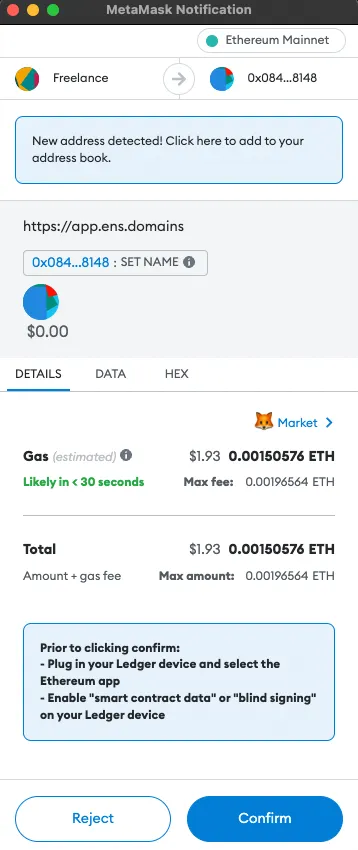
Confirm the transaction in Metamask and upon transaction success, your newly purchased ENS domain should now be mapped to your account address.
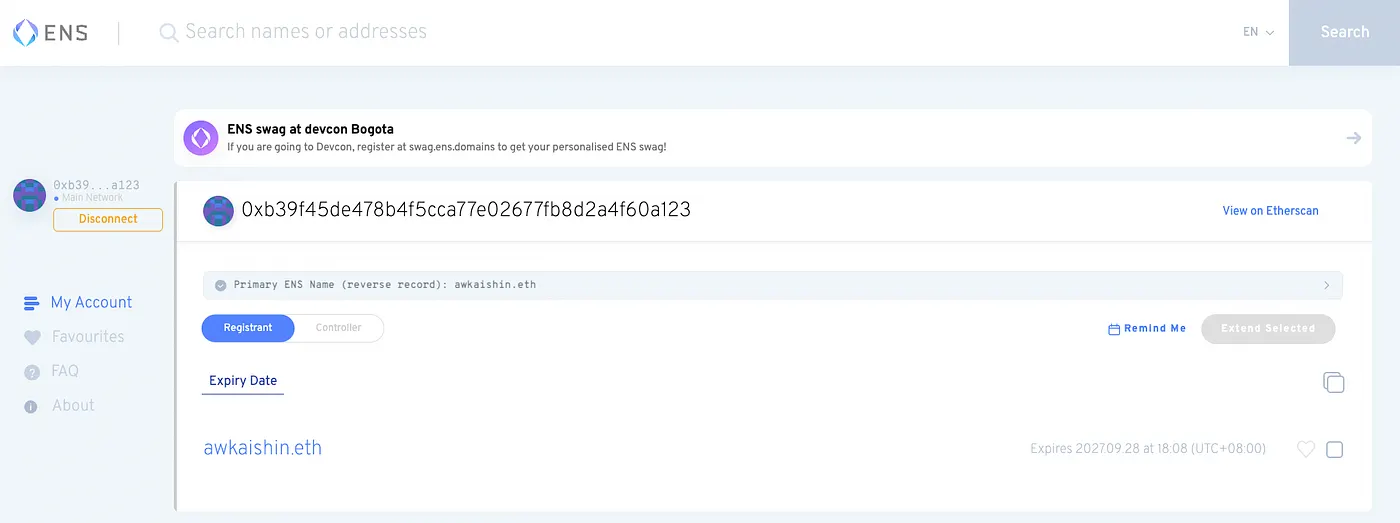
If you see the above, it means you can now use your ENS domain name across all Web3 platforms that support the ENS implementation. This includes using your ENS domain for receiving coins/tokens and even setting up Web3 native emails or social accounts (to be covered soon)!
Validating ENS Domain
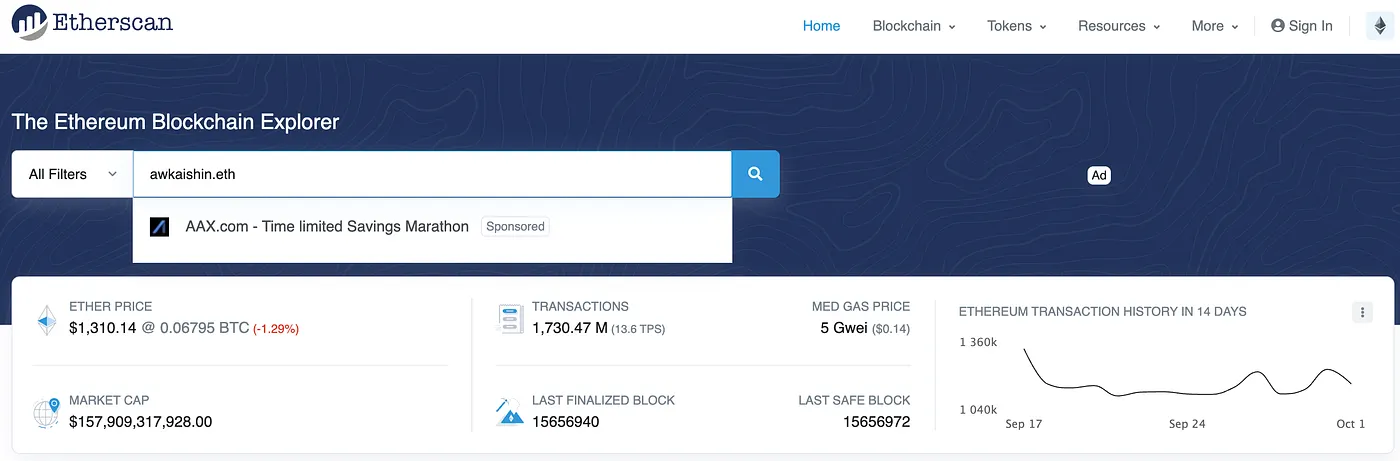
To see our newly bought ENS domain in action, we can navigate to Etherscan and enter our domain into the search bar. Do remember to add the .eth that comes with your ENS domain.
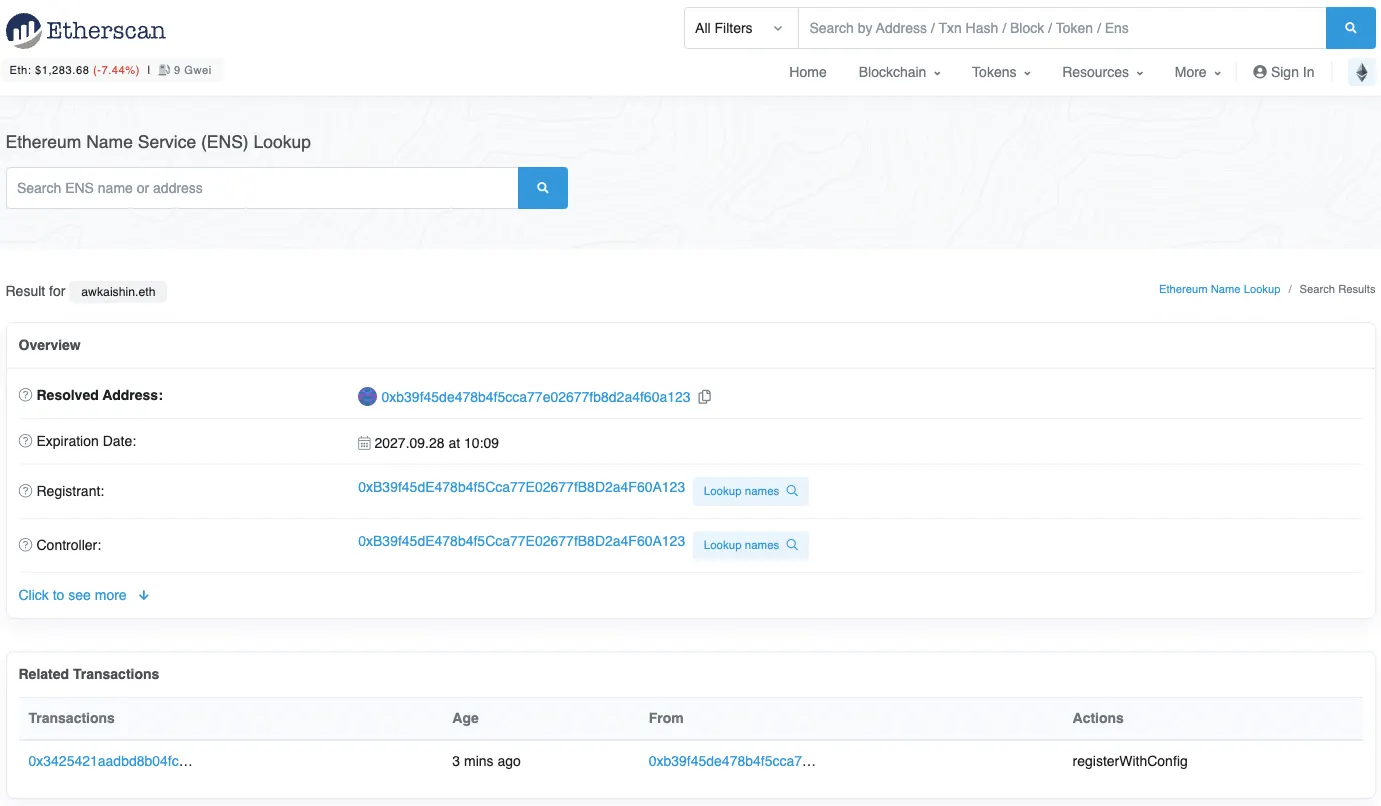
On submitting the search, Etherscan will then load the details behind the ENS domain. This includes the Etereum hexadecimal address which it resolves to as well as when the domain expires. In my case, you can see that the domain awkaishin.eth was successfully registered to the resolvable address of 0xB39f45dE478b4f5Cca77E02677fB8D2a4F60A123. The best thing about Web3, this is viewable by everyone: https://etherscan.io/enslookup-search?search=awkaishin.eth.
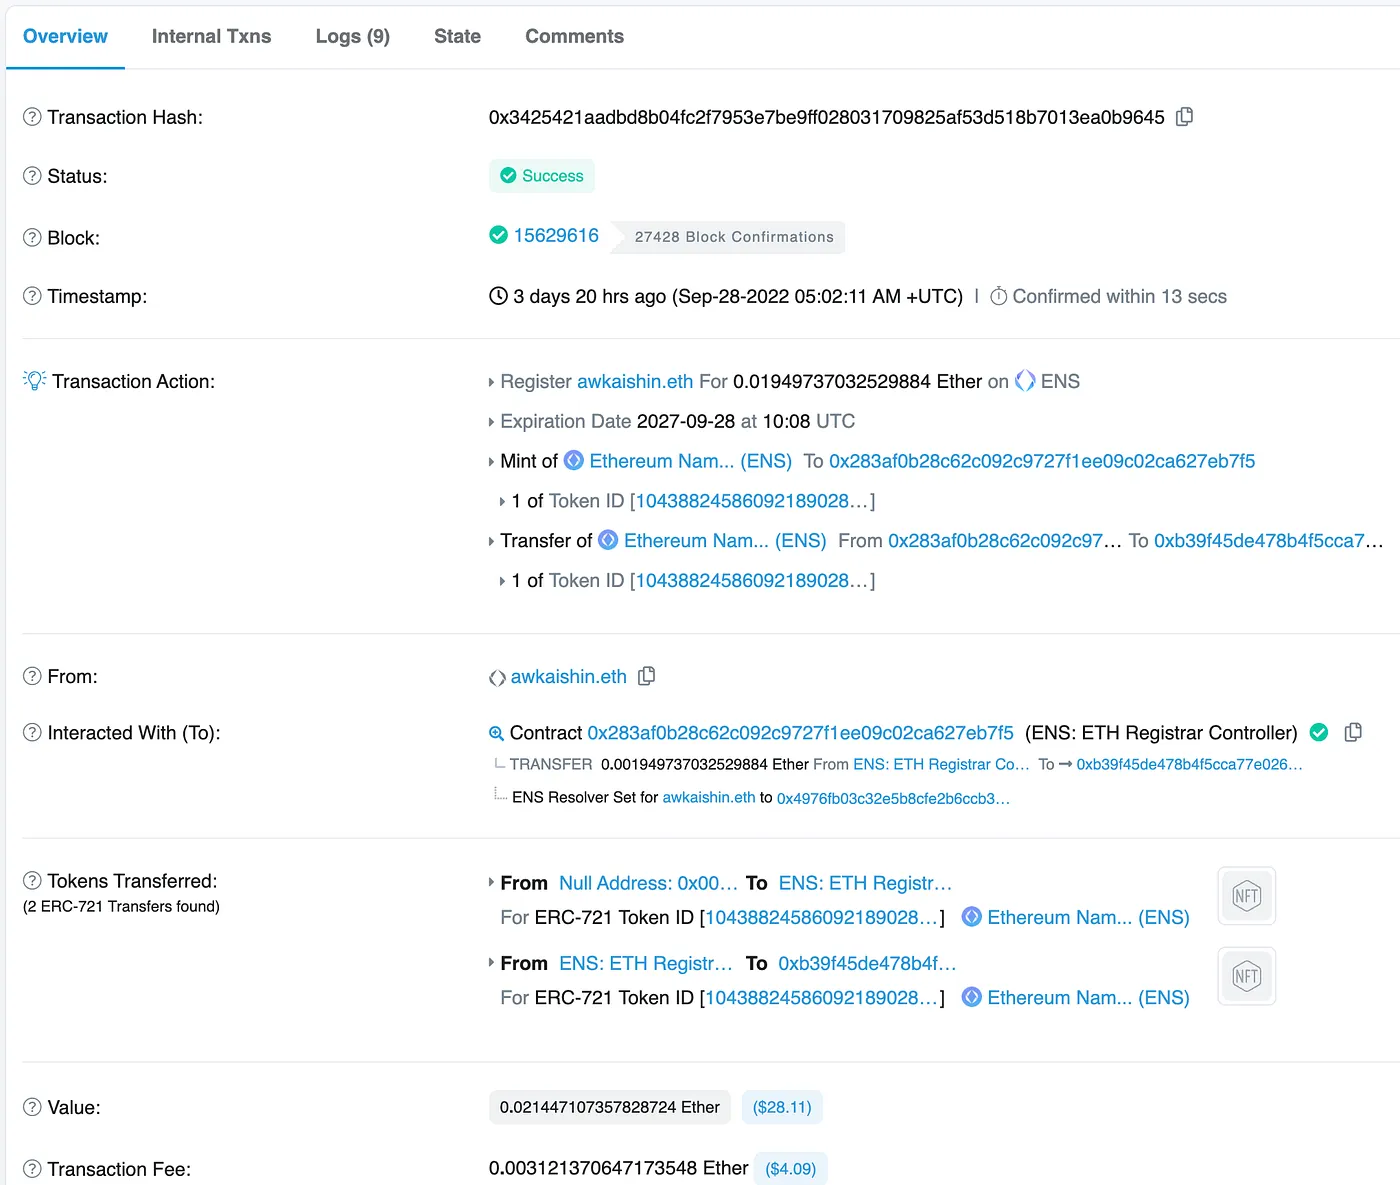
You can even view the registration transaction by navigating into the transaction tab.
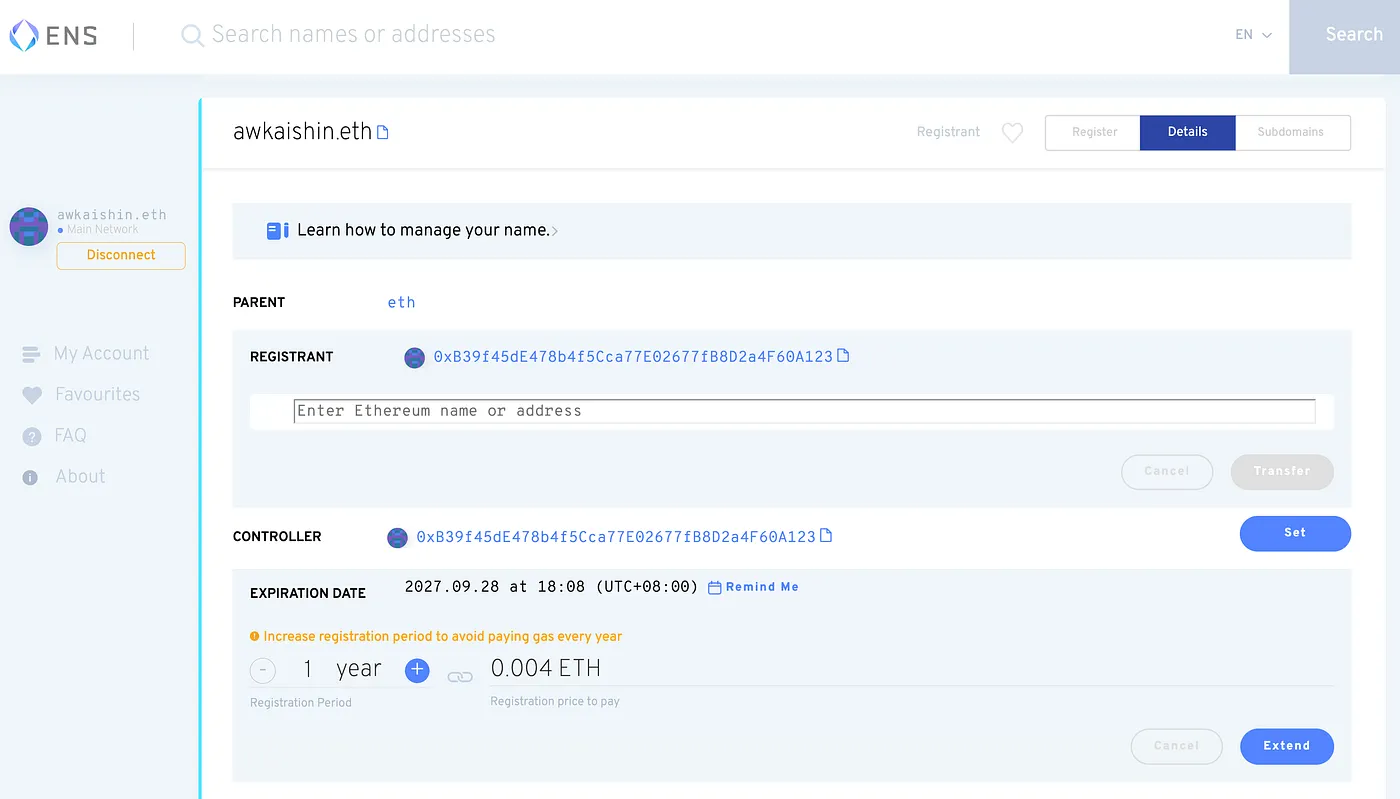
Under the ENS app, you can view further details of your ENS domain and this includes the option to transfer the domain to another address and even extend the validity of the domain.
You can now interact with a lot of new and exciting applications which are being built on top of ENS. Remember that ENS forms a convenience layer that makes Ethereum addresses more human readable. This will be a key building block of the decentralised identity space as Web3 transitions to just being referred to as the web.